In this article you will find
instructions and tips about setting of the floating vibrato unit (also
inappropriately called tremolo) of an electric guitar,
with special regard to models often used on super-strat style instruments. This is part of the general setup of the guitar,
that involves topics covered on the Soundsation blog as intonation, pickup and action adjustments.
Before continuing you should
have:
All that verified, we can talk
about how to self-adjust a vibrato bridge with two studs and springs.
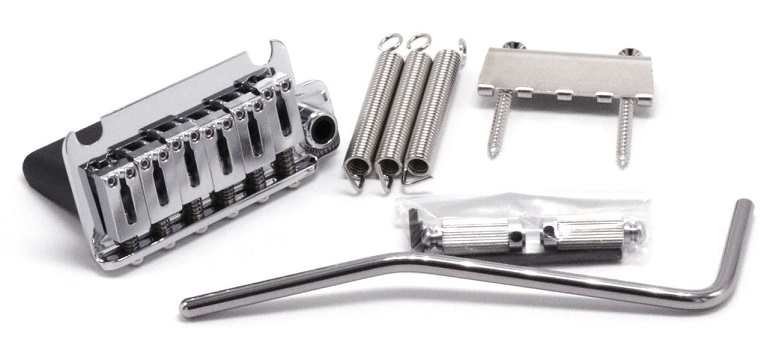
Please take note that the setting of a Fender
vintage style six screw vibrato is debated in the Soundsation blog article “The setup of your guitar (PT. 7) –Setting a vintage style vibrato”, largely valid for floating bridges with two studs without a locking nut. Examples are the
G&L Dual Fulcrum Vibrato that Leo Fender introduced in the '80s, the
Fender 2-Point Synchronized Tremolo featured on 1986 Dan Smith's and
George Blanda's American Standard Stratocaster, the Wilkinson VS100N (left photo below),
the Music Man Standard, the Gotoh NS510T-FE1 (right photo below) and similar ones, of which we are going to talk here. 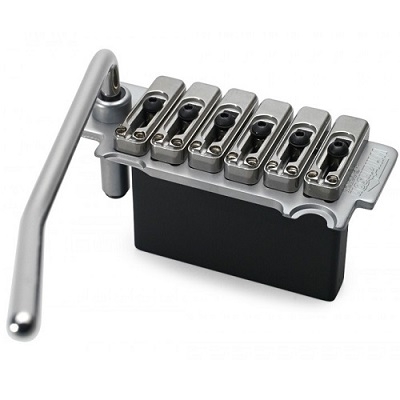
How are floating bridges made?
Talking about stud mount bridges with just two
studs/screws instead of traditional six screws, the most popular are those in
the Fender American Standard style and various types of Wilkinsons, the latter
designed and introduced in 1986 by Trev Wilkinson, musician, hardware
and pickup inventor, founder of the English brand Fret-King. He also designed
the Roller Nut, used on some strats since 1987 and replaced by the
Fender LSR in the early '90s.
Wilkinson parts are currently made by Japanese Gotoh
and Korean Un Sung.
Almost all guitar and hardware manufacturers
have these kinds of floating bridges in their list, mostly matched at the
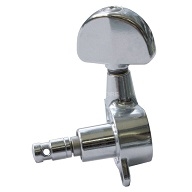
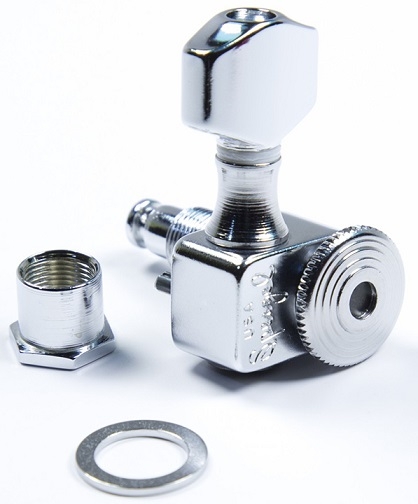
headstock by locking machine heads of brands such as Gotoh (left photo below), Schaller and Sperzel (right photo below). These tuners clamp strings in the shaft
holes and prevent tuning loss when the vibrato arm is heavily handled.
Materials floating bridges are made of are essential
for their mechanic and sound quality. Certainly steel has to be preferred at
least for saddles, because it provides the highest vibration transmission
speed and a good sustain.
Tremolo blocks (or sustain blocks) are often made of aluminium, brass, titanium,
zinc alloys (especially Zamac: Zinc Aluminium Magnesium) and also
pressed metal powder in cheaper models, as the '80s Fender Am Std, poor
in terms of sound and duration. Studs and plate knife edges are very
important for bridge duration and operation smoothness. G&L
fifty year old tremolo, by example, features hardened steel for the bridge
frame, the sustain block and the studs, whereas the threaded
anchors dipped into the guitar body are made of brass. Saddles are made of stainless
steel. Considering the hardness of this material compared to hardened
steel, string to saddle contact point must be very well machined in order to
avoid friction and breakage. Knife edges to studs joints are circular
and wraparound, a useful feature during string changing, as we'll see.
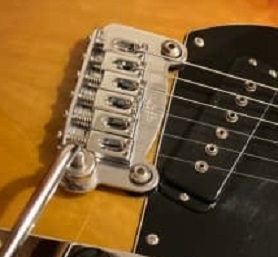
Wilkinson VS100N plate is made of hardened steel;
studs, saddles and arm are made of stainless steel; the sustain block of zinc
alloy. It's a great product, and it can also replace the American Standard
tremolo with no modification. However, it is always good to turn to a luthier!
Floating bridge advantages
- General lightness
and two stud swinging give floating bridges greater fluidity and ease
of use if compared to vintage style bridges.
- These bridges with
matching locking tuners and well cut self-lubricating nuts (or roller
nuts) allow wide intonation excursions with no tuning loss, both in up and
down ways.
- In the finest models,
saddle clamping to the bridge plate, together with the above described
points, provide tuning and intonation retention for a long time,
virtually making setup controls necessary only at string change.
Floating bridge downsides
- Instrument overall
sound is somewhat different from the one of a typical vintage style strat, with an apparently minor contribution of body wood in
favour of bridge metal. By example, Wilkinson bridges can emphasize a
metallic resonance around 2000 Hz (spike). If this not appreciated, the
problem can be solved by the adoption of saddles made of alternative materials
like GraphTechs.
- According to some
experts, other metal contributions to sound come from locking tuners, that are
heavier than vintage style ones, and from eventual metal nuts as roller ones.
- The presence of only
two balance points and a thinner sustain block (in order to prevent beating on
the body during up/down bridge movements) can induce a strange sound
fluctuation called warbling when playing on the higher portion of
the fretboard, after the 12th or 14th fret. If this event
occurs, it is solved on prestige guitars by the adoption of stabilizers
like the Hipshot Tremsetter and similar others, a sort of dampers that
in addition ensure a decidedly lower intonation drop of open strings during
bending and, generally, an even smoother operation of the vibrato.
- You have to replace
strings one at a time. Infact, due to
sudden tension loss, the bridge looses its grip on the studs and collapse onto
the guitar top, while springs disengage the claw. When you need to clean or
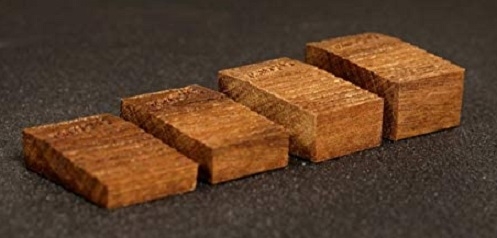
polish the fretboard, and therefore to release all the strings, it's good to put a wood, plastic or hard rubber wedge under the
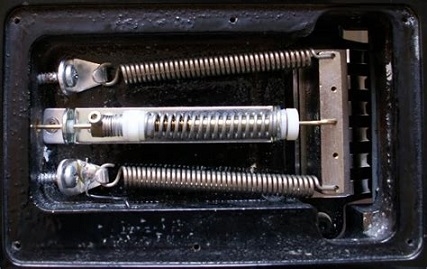
rear side of the bridge, thus avoiding the circumstance. I use a purpose-built
wood block (photo below) or a pen ink eraser, but everyone can find his own
solution. Somebody prefers a fitting Post-it pad. The important thing is
not risking to damage the top paint.
Floating bridge setup
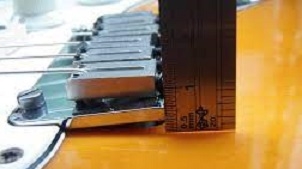
What has been written about the six screw vintage style bridge setup is also effective for floating bridges with two studs without a locking
nut, at least for the spring tension adjustment. The main difference here is
that the bridge should be parallel to the guitar top, especially
if it lies in an excavation; otherwise, you can set it flush with the
body top or angled according to your taste and need, as it happens for the
Fender Am Std.
Then proceed to tuning and spring tension in following
alternate steps until the desired result is reached.
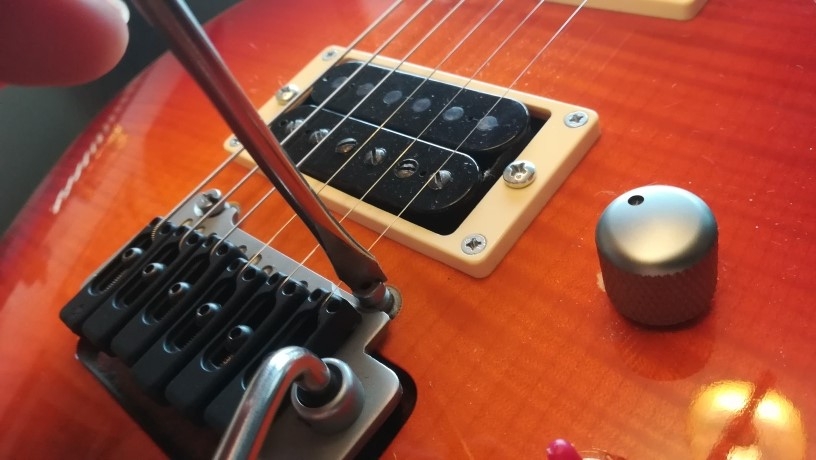
- Height (action)
Setting a floating bridge height is easy: you just
have to act on stud Phillips or slotted or Allen screws. It is important
to set the bridge plate at the height recommended by manufacturer or your
trusted luthier. Using the right number of springs (2-3), I suggest the
bridge to stay as low as possible on the guitar top as long as a
friendly use is got and the action is optimal. Like I said, some guitars
feature a recessed top routing where the bridge stays, thus keeping it
as low as possible and allowing a very comfortable action.
Once you have lowered the bridge as much as possible,
you can complete the work acting on the screw pair of every saddle.
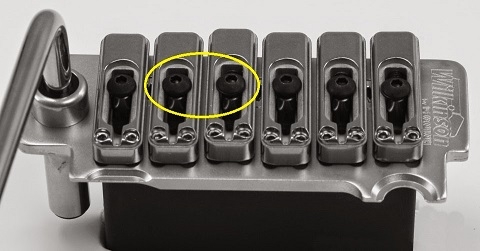
On some floating bridges, as the Wilkinson VS100, you
have to loosen an Allen screw that secures the saddle position in order
to ensure stillness and maximum sound transmission: this has to be done before
any height or intonation adjustment.
- Radius
Using the same screw pair you have used for the saddle
height setting, try to follow the fretboard radius as you would do on a
common strat (in this regard, read our blog article).
- Intonation
Intonation procedure is the same as for vintage bridges in the case of Fender 2-Point
Synchronized (Am Std) style tremolos, that are equipped with Phillips screws
inserted from the back (you can read our blog article).
- Arm
At this point you still have to adjust the arm
height in its position and your preferred rotation friction. Modern
bridges provide setting by means of a spacing screw under the arm hole and a little
Allen screw radial to the plug point. This applies when the arm and the
hole are not threaded.
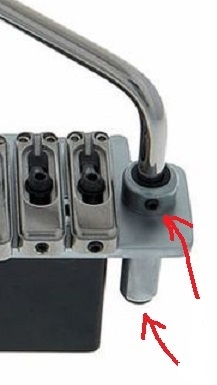
Some arms have removable nylon rings to set the
friction plug-in.
If you have any doubt, especially if the nut is height
adjustable with screws or shims, turn to your trusted luthier.
Floating is OK, but there's more
than this
Construction accuracy, quality materials, locking
machine heads and a good setup provide a flowing, easy and reliable
use of the arm on floating bridge equipped instruments, without tuning loss
not even if you are exceeding in swing – within certain limits. There was a
time though this was not the situation, and it was necessary to turn to the
only possible choice: the Floyd Rose bridge, still unrivalled for a
“wild” use of the vibrato. This subject is dealt with on the fantastic
Soundsation blog, along with the Kahler vibrato, the other great
competitor in the '80s/'90s!
Fabrizio Dadò
